Setting up your RTC client for working with DevOps Services
- Published:
- categories: ibm
- tags: ibm, eclipse, rational-team-concert, devops-services, bluemix
Getting started with DevOps services is simple and that is what it is designed for :) But to get to work for day to day work it is unlikely that a web editor alone will cut it. So enter your editor or choice and the supporting tools you need to work. Here I’ll use a project that uses Track and Plan, Git Hosting, and the Build Pipeline so it will be useful to have in context access to this information from my development ide on Windows.
In this case, I would normally start with the default Rational Team Concert 5.0.2 client1 which is based on Eclipse 3.6(Helios)2 then and add the development plugins to it to support new environments. However the Eclipse 3.6 client is getting a bit old and many of the plugins we are intertested in here are targetted at Java 7 Eclipse 3.7 and higher, so I recommend that you look at using a more recent version of Eclipse, we’ll go for the highest currently supported version which is Eclipse 4.33.
Table of Contents
- Pre-Requisites
- Setting up Change Management
- Setting up Version Control
- Extending Eclipse with Plugins
- Getting Setup to Work
Pre-Requisites
First we need to install any development libraries that we will be using here I’m all over the place so I want to have at least Ruby, Python, Go, Java, and Node. I’ll leave that as an excercise for the ready on other platforms but with Windows and choco it is pretty easy, I just use Choclatey on Windows to simplify things, use whatever tools you already use for package management:
$ choco install ruby1.9 python2 golang nodejs jdk
Next since we are currently interacting with our Track and Plan Projects using the web console we have acess, but by using Eclipse with the Rational Team Concert Eclipse plugins installed we bring our work management in context with our development. To do this we need to install Eclipse, the Rational Team Concert documentation for DevOps Services indicated we need version 4.33 so let’s start there, you can head over to Eclipse Downloads where you will find the latest stable version available 4.4 at the moment we want to change to the 4.3(Kepler) release in the right navigation bar and select the variant you want to start with, here I will select the Eclipse IDE for Java Developers since that includes a few of the plugins we want to add already like Java Developer Tools, XML Editors, and Git included. Once your download is complete, there is no install just unzip where you want it and you are done.
Or you can install using your favorite operating systems package manager, in my case from my Git Bash Shell:
$ choco install eclipse-java-kepler
...

$ cd /c/eclipse-java-kepler
$ ./eclipse
I normally just drag a shortcut to the client eclipse executable to my taskbar or start menu for easier access.
Setting up Change Management
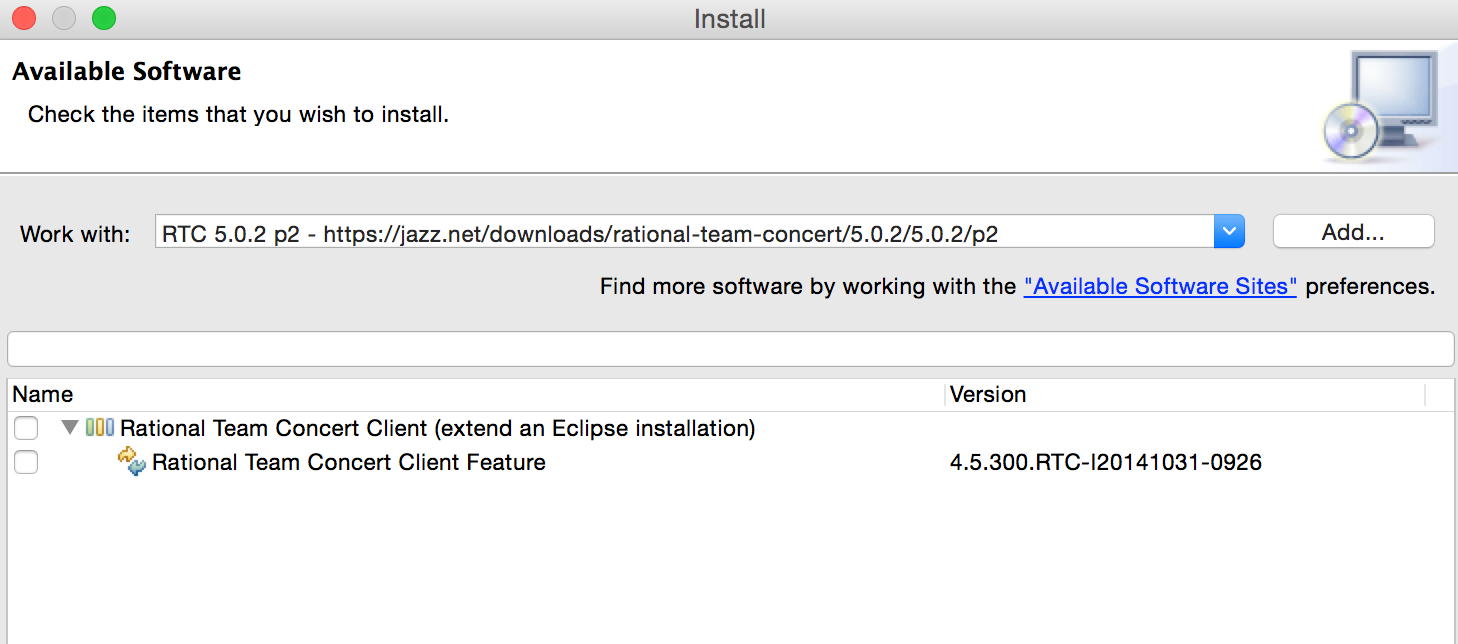
Now with a working Eclipse installation we are ready to add the Rational Team Concert plugins, as of Feb 2015 the latest GA version that works with DevOps Services is 5.0.2, although this continue to change as new versions of Rational Team Concert are released. For future proofing double check the instructions3 that list the update site to use, for now use the public jazz.net p2 repository for 5.0.2 to add the software. So Help > Install New Software from our Eclipse client and add the update site https://jazz.net/downloads/rational-team-concert/5.0.2/5.0.2/p2. Select the option for Rational Team Concert Client Feature and complete the install and restart your Eclipse workbench when prompted.
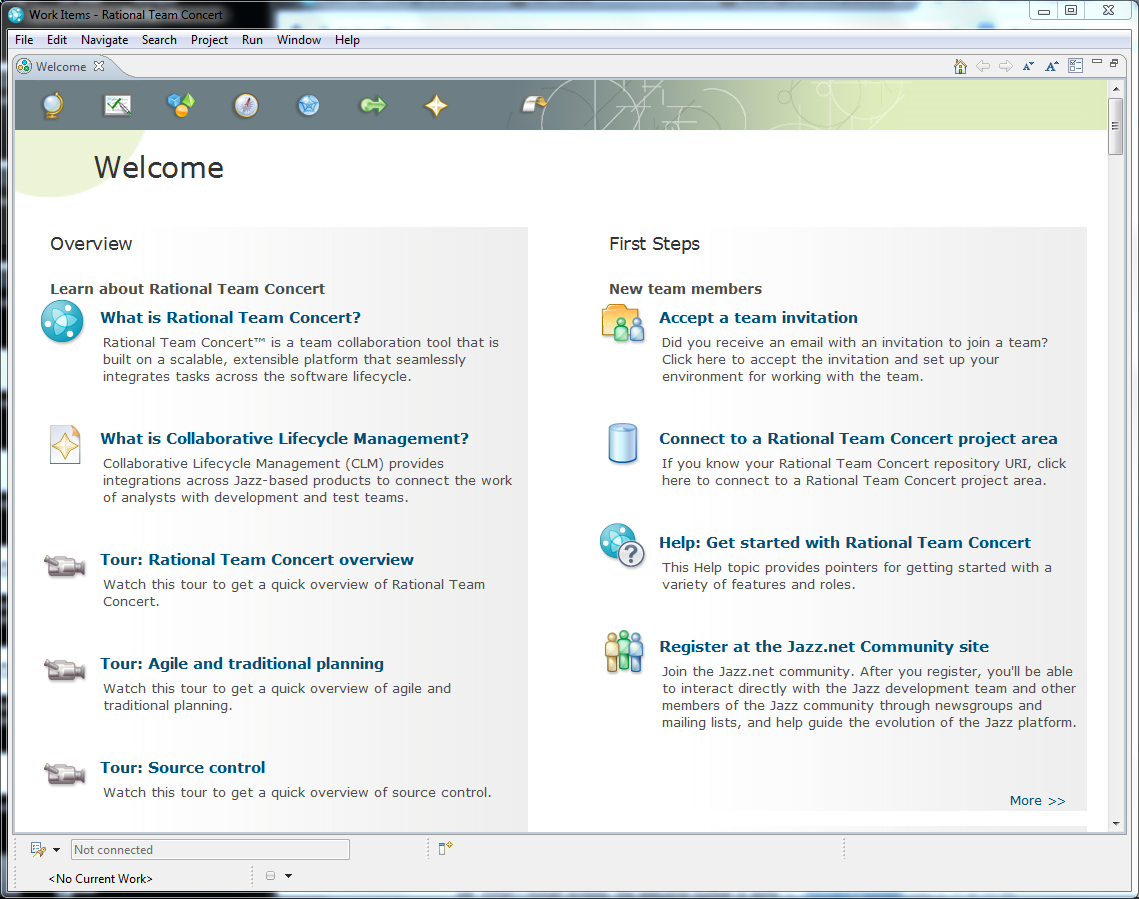
Once the client starts you will be shown the Welcome screen the first time only, or any subsequent time that you add a new plugin to the client. (if you want to show it again for some reason it is located at Help > Welcome).
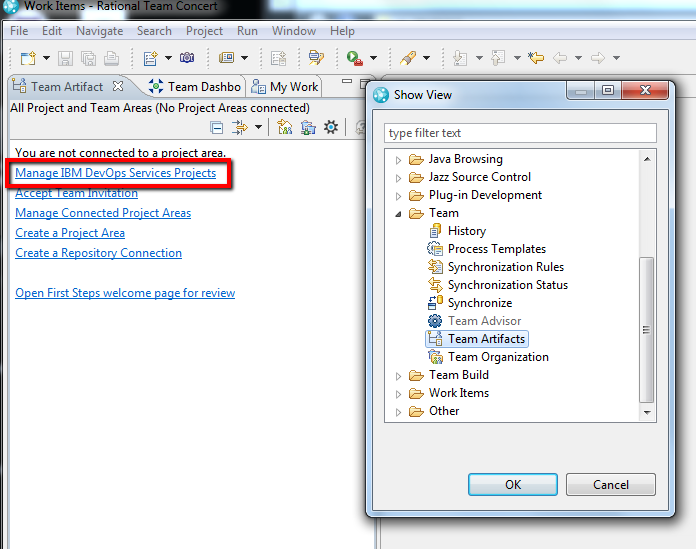
After the client loads you can either use the Connect to Rational Team Concert Project Area option or if you have closed this page use the Team Artifacts view as below (if this is not visible, Window > Show View > Other… and type Team in the search field to filter the list down or just browse for a folder named Team ) from there you can use the helper available in the RTC client Manage IBM DevOps Services Projects
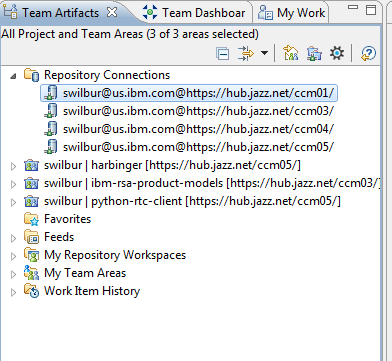
You will be prompted for your IBM ID and password and they shown all projects that your user has access to. Select the project(s) you want to access your Track and Plan features for, just keep in mind that only one Project can be set as the current at any given time, we will open some views to get a feel for this. After you select your projects and Finish you should see something like this:
Now we are ready to manage our work, to my note before, we need to pick which project we want to view work for, so switch over to the My Work view and select which project you want to view your working queue for.
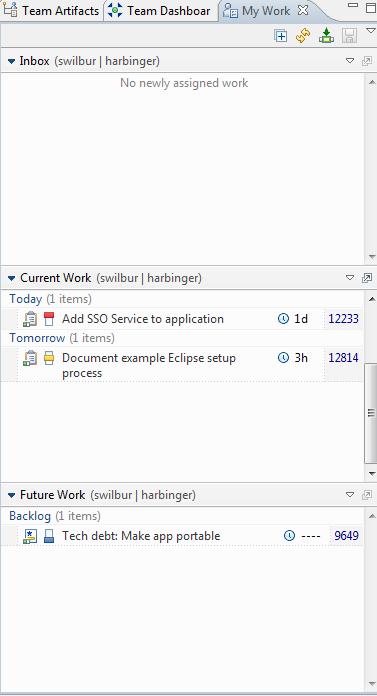
This is helpful as it puts the work right here in your development environment, that is it for now, go ahead and open some work items and you will see they look similar as you see them in the web so nothing too new here. We’ll come back to this once we have our code ready and we starting doing some work how to use them together for productivity gains.
Setting up Version Control
Next is to work on how you will manage your version control from within Eclipse, if you intend to use the Jazz SCM system then you are done and honestly you probably already had sorted out the comments below, you and we already connected everything we needed to in the previous step, so you can go to the next section.
For the rest of us using Git there is a an additional thing to consider, if you have not been using Eclipse then it is unlikely that your git repository contains valid Eclipse projects, so you will need to add a .project to your folders to have them show up in the appropriate Package Explorer views. The .project file controls how Eclipse treats the type of the project, variables, and build tools, but for now below is the most basic example of a new Generic Project called Sample’s .project file:
<?xml version="1.0" encoding="UTF-8"?>
<projectDescription>
    <name>Sample</name>
    <comment></comment>
    <projects></projects>
    <buildSpec></buildSpec>
    <natures></natures>
</projectDescription>
As a simple start, you can create .project files for your top level folders, just substitute the <name>Name</name> tag to match your folder name or git repo name in this case, it is a bit contrived if you are used to setting the root of your project to the root of your version control with no containing folders, but it provides a helpful mechanism when you start looking at multiple projects at once, as you will be doing inside your Eclipse workspace. There are lots of ways to organize your content, but a simple structure where each project is a distinct git repository is a good practice.
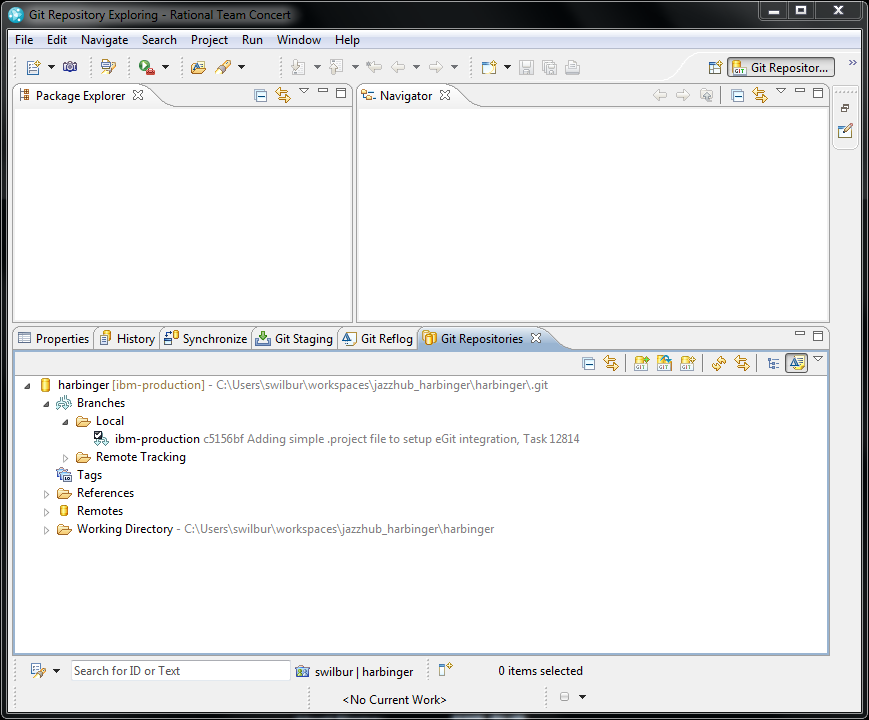
For this example, I will just add a .project file to the root of my git branch with the name of the repo as it will be checked out into a folder by that name by default, so it keeps it simple. Add the file, update the name tag in the file, and commit it to your branch. Once I completed this in my git command line client we are ready to connect from out Eclipse client.
Since we already have the eGit plugin installed we can confirm you can connect to DevOps Services hosting, go to your project and grab the git url and confirm you can connect to a repo.
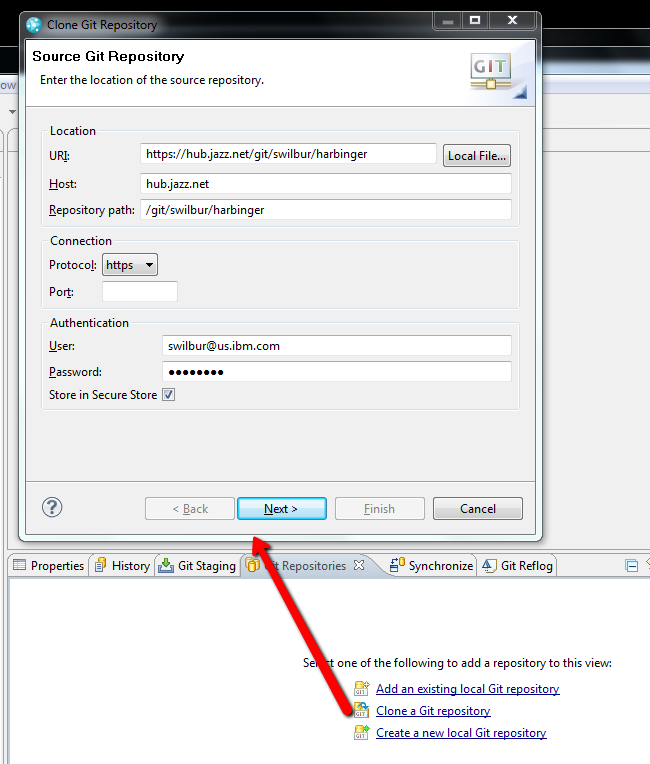
Select the desired branch(es) you want to clone and track locally and specify a location for checking out the files, I usually go with the proposed default of putting it within the current workspace that Eclipse is currently running in so I don’t confuse this with some other copy I may have elsewhere.
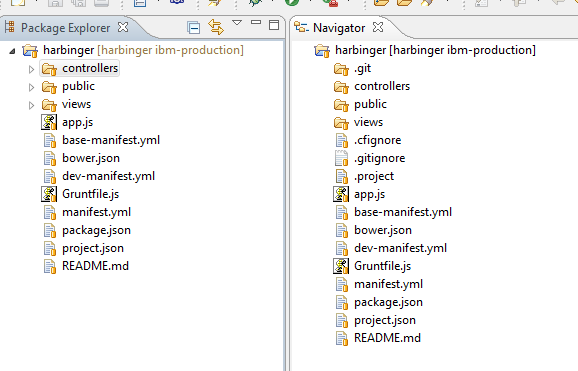
Assuming we did our addition of the .project file correctly we just need to select the File > Import option, and you will see a Git > Projects from Git choice and then you will be able to browse to the Local lcoation you just cloned the repo to and you will see an option to import Existing Projects. If you did not create the .project file already there are other options to create a new project or import a git repo as a General Project that could also be used, try them out at your leisure, the end result will be the same. We will have an Eclipse project open that is tracking changes in git, now you are one step closer to actually making changes.
Extending Eclipse with plugins
At this point, we can acceess our work items to figure out what we are supposed to be doing, and checkout our content to actually make the changes. In the event that your development is Java you are probably ok, besides missing the web tools platform to help with setting up server runtime libraries. But for non-Java languages the default RTC Eclipse client is missing basic syntax highlighting, build support, debuggers, and any other niceties you are probably used to in your existing non-Eclipse IDE so needless to say not a very good ide yet.
Thankfully everyone builds plugins that are easy to install with a bit of searching for the public repos and the Install New Software feature in the Eclipse shell. For this scenario I want to setup a client that can dabble in lots of different types of development, so I’ll just list the update sites I used to set this up and any specific deviations from just the defaults. One thing to confirm is that we are running Eclipse with via Java 7, so just double check as most of the plugins require Generics and Collections that do not exist in earlier Java releases.
First thing we do here is to add the Release site for your current version of Eclipse, here for 3.6 that is http://download.eclipse.org/releases/helios/. Now we just need to start the Help > Install New Software process against either All Available Sites or that specific site to generate a meta-data download and you will force and update to see if there have been any changes, as well as add a number of other update sites to our available sites list.
Since we are in Eclipse Kepler a much simpler option is to use the Eclipse Market Place option that was added in Eclipse 4.2, you can just drag and drop these links onto your running Eclipse workspace ( N.B. I had to drag it onto the outside window borders to get it to pickup as an installer):
Only a one of them are not available via the Marketplace currently is the GoClipse plugin, we need to use the old Help > Install New Software
- goClipse Update Site - http://goclipse.github.io/releases/
Getting Setup
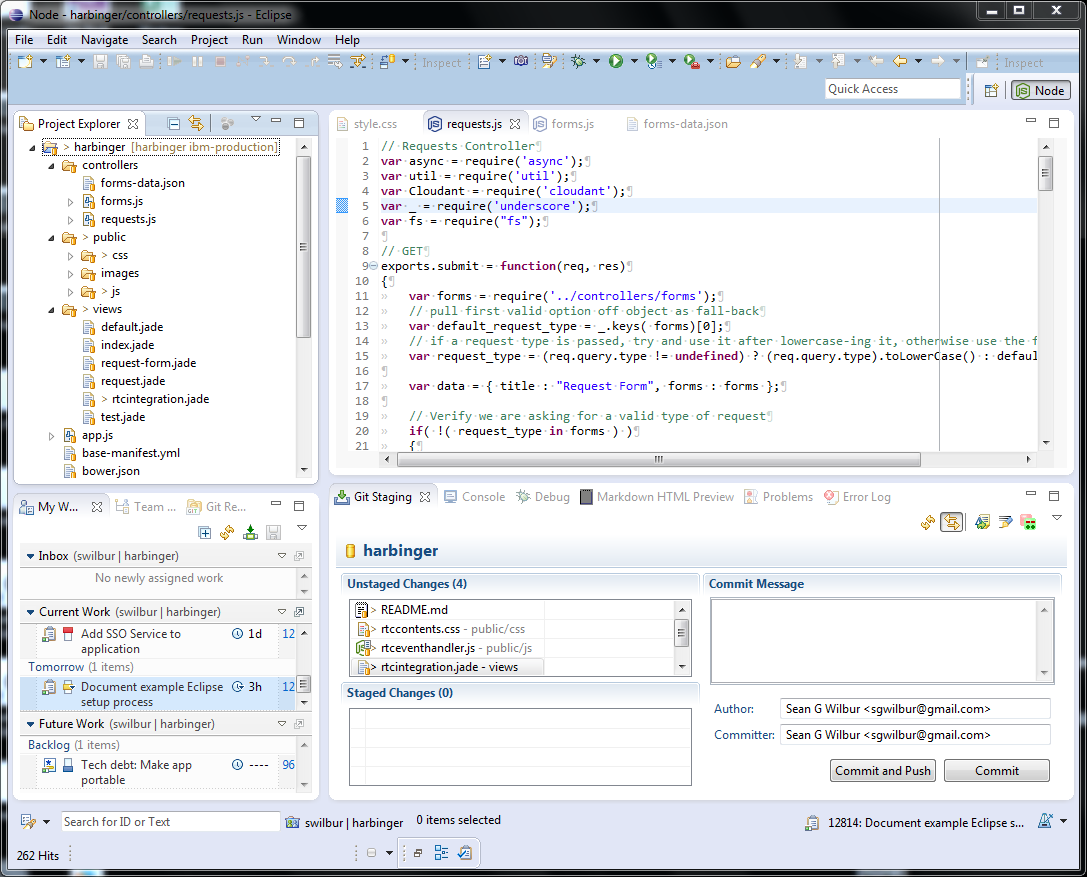
Last piece here it to get your new Eclipse client setup for working with your current project. We have connected to RTC to get our Track and Plan work via the RTC plugin, connected to DevOps Services Git Hosting via the eGIt plugin, and ready to do meaningful work with your chosen development runtime via the plugins we just installed.
Now we can add some of the relavent Eclipse views to our Development Perspective. The interesting ones for RTC and Git are:
- Team Artifacts
- My Work
- Git Repositories
- Git Staging
Here is an example of my workspace from the Node perspective:
Now the last one, I have just started using is the Bluemix plugin specically for managing deployments and working with Bluemix. We just installed it for now and have not covered that specifically here, but we can look at that further in another post.
Reference:
- Chocolatey
- eGit
- pyDev
- Dynamic Languages Toolkit
- PHP Development Toolkit
- goClipse
- IBM Eclipse Tools for Bluemix Beta - December 2014
- Eclipse CloudFoundry Integration